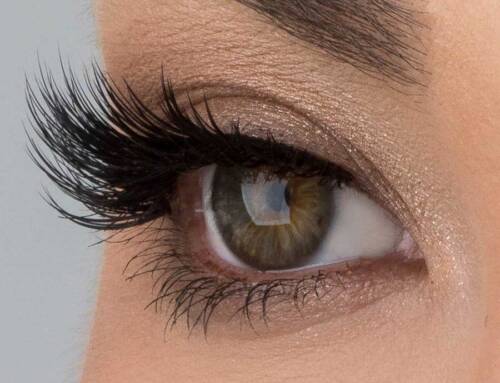
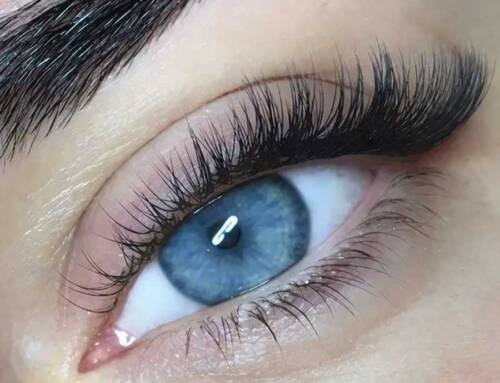
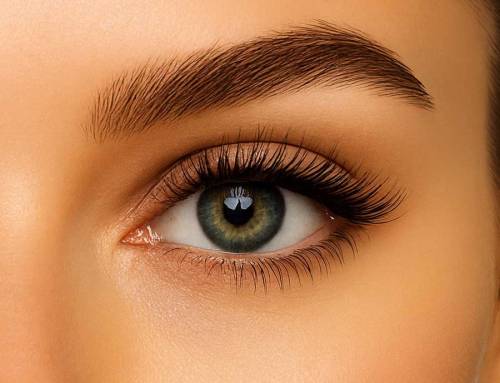
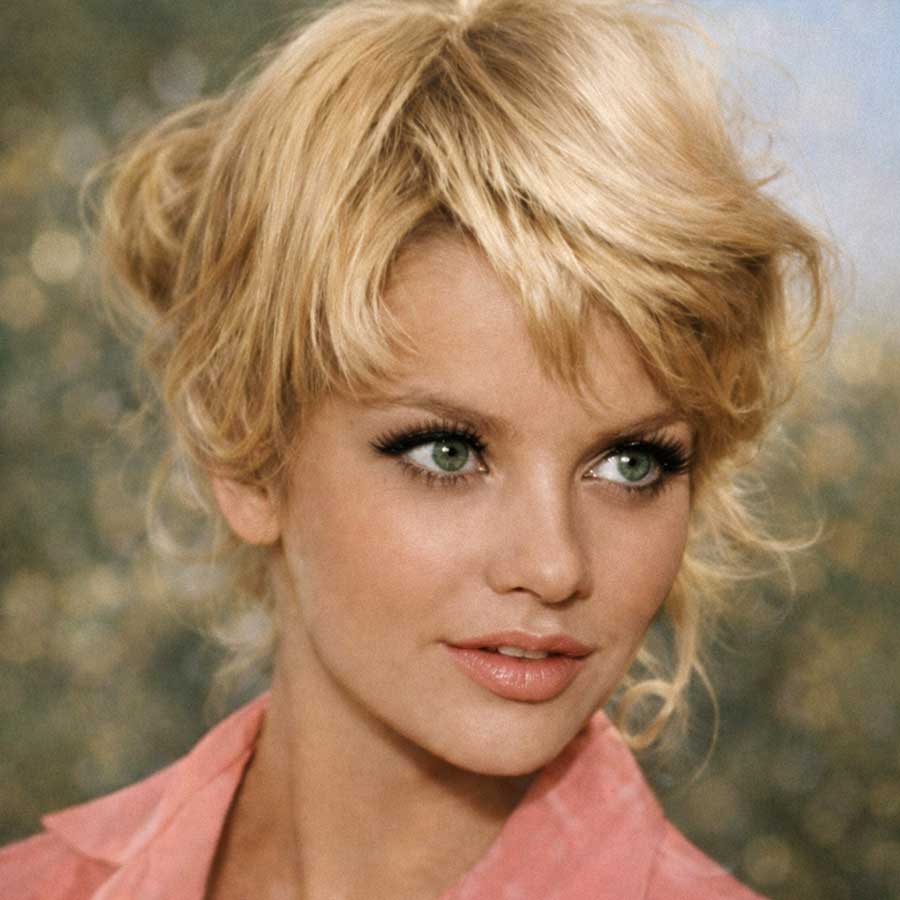
Russian volume lashes, also known as Russian lashes, have become a popular choice for those seeking a dramatic and full look. This technique involves applying multiple lightweight lash extensions to each natural lash, creating a voluminous and glamorous effect. Whether you are a professional lash technician or a beauty enthusiast, mastering the art of Russian volume lashes can elevate your skills and offer your clients or yourself a stunning lash appearance.
Understanding Russian Volume Lashes
Russian volume lashes are different from classic lash extensions in that they use ultra-fine synthetic fibers that are much lighter and thinner. This allows multiple extensions to be applied to each natural lash without causing damage or discomfort. The technique requires precision, patience, and practice, but the results are worth it. With Russian lashes, you can achieve a fuller, fluffier look that is perfect for special occasions or everyday wear.
Tools and Materials Needed
Before you start, ensure you have all the necessary tools and materials. Here is a list of what you’ll need:
- Lash extensions (0.03mm to 0.07mm thickness)
- Lash adhesive
- Lash tweezers (isolation and application)
- Lash palette or tile
- Primer and cleanser
- Lash brushes
- Micropore tape or eye patches
- Nanomister or nebulizer
Preparation Steps
Proper preparation is crucial for achieving the best results with Russian volume lashes. Follow these steps to prepare for the application:
- Sanitize all tools and your workspace to maintain a clean and safe environment.
- Have the client remove any eye makeup and thoroughly cleanse their natural lashes with a lash cleanser.
- Apply primer to the natural lashes to remove any remaining oils or residues.
- Use micropore tape or eye patches to secure the lower lashes and prevent them from getting in the way during the application.
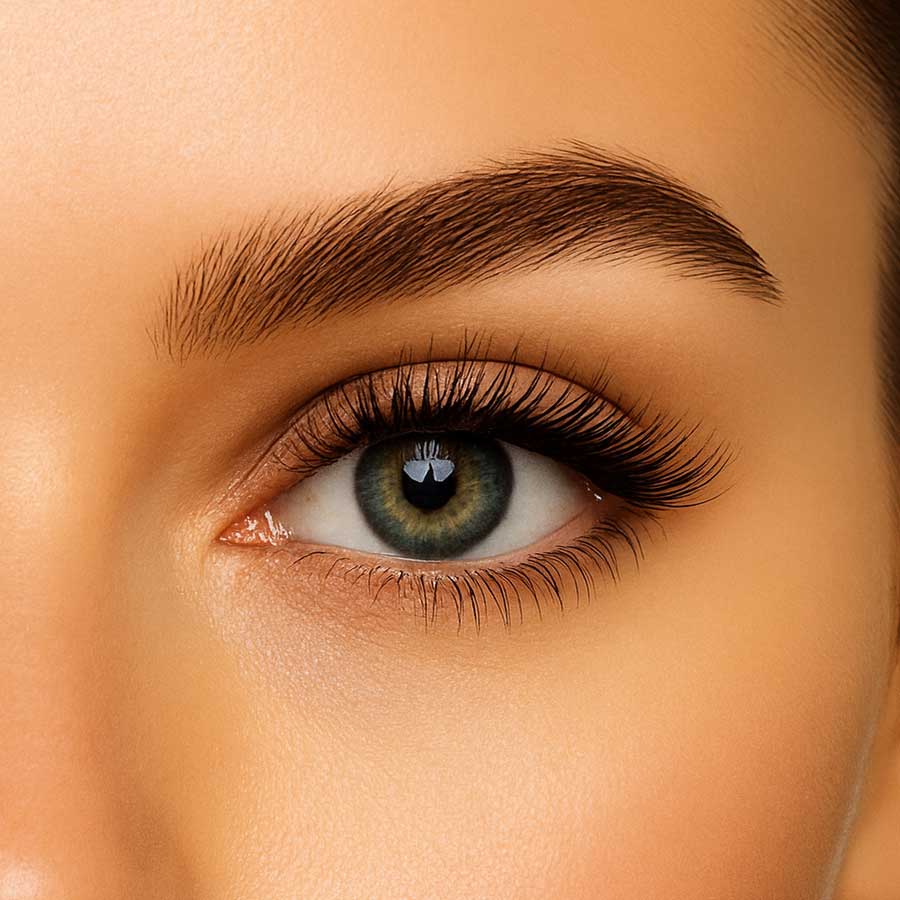
Choosing the Right Lash Extensions
Selecting the right type lash extensions is essential for creating a balanced and natural-looking volume set. Consider the following factors:
- Thickness: Use extensions with a thickness between 0.03mm and 0.07mm. Thinner extensions are ideal for creating a soft and fluffy look, while thicker ones add more volume and drama.
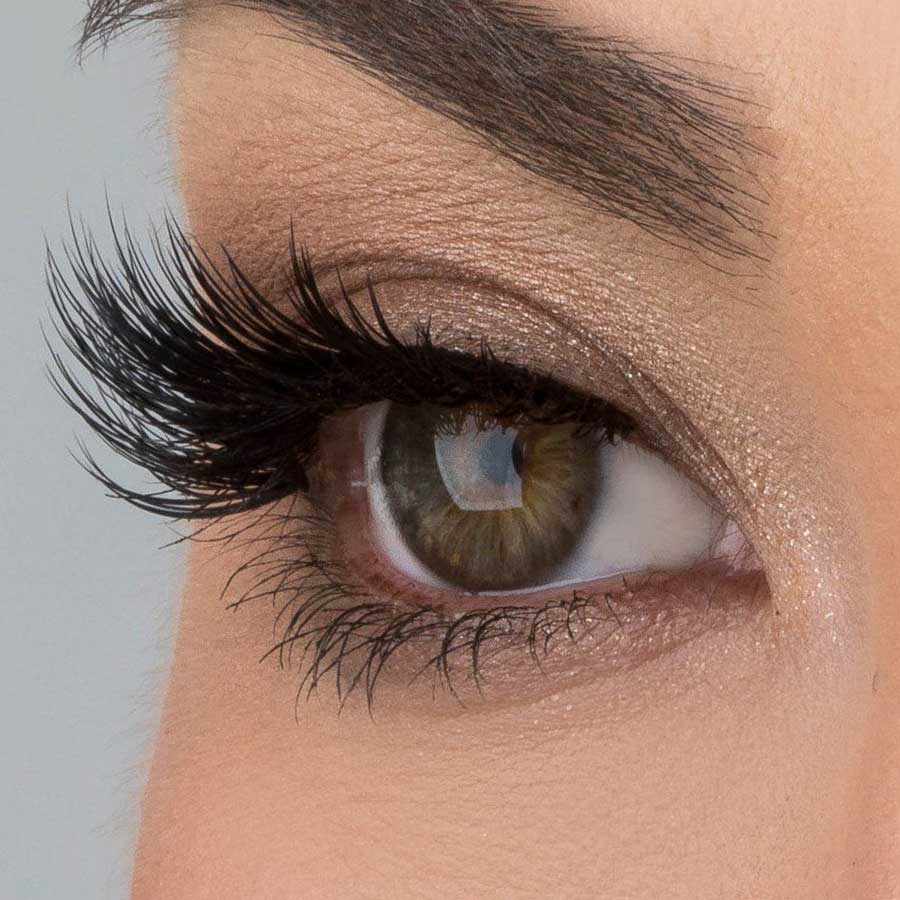
- Length: Choose lengths that complement the client’s natural lashes. Mix different lengths to achieve a more natural and graduated effect.
- Curl: The curl of the extensions should match the client’s natural lash curl for a seamless blend. Popular curls for Russian volume lashes include C, D, and L curls.
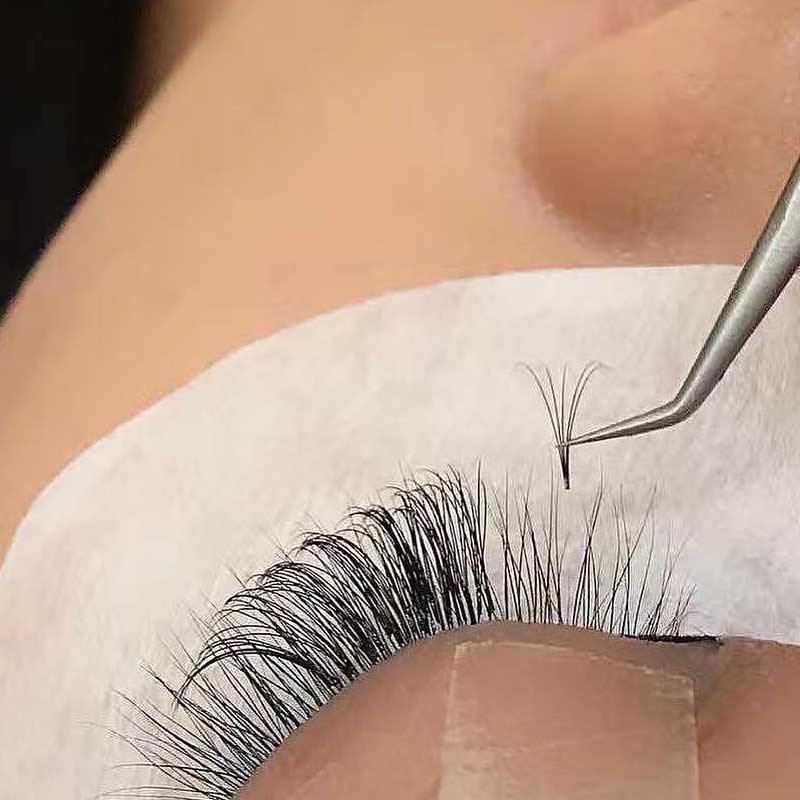
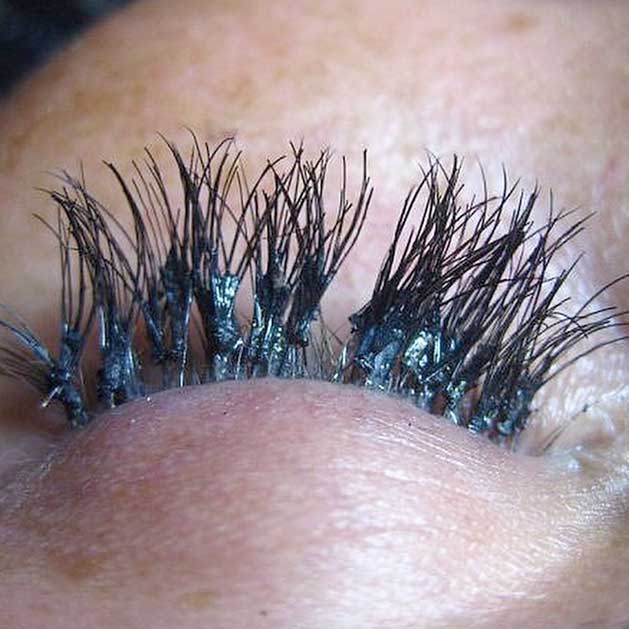
Creating Volume Fans
The key to Russian volume lashes is creating volume fans. These fans consist of multiple lash extensions that are fanned out and applied to a single natural lash. Follow these steps to create volume fans:
- Pick up a few lash extensions from the lash strip using your tweezers.
- Gently pinch the base of the lashes to create a fan shape. The number of lashes in the fan will depend on the desired volume (typically 2D, 3D, 4D, 5D and 6D).
- Dip the base of the fan into a small amount of lash adhesive.
- Apply the fan to the natural lash, ensuring it is securely bonded.
- Repeat the process, varying the direction and placement of the fans to create a full and even look.
Application Techniques
There are several techniques for applying Russian volume lashes. Here are a few common methods:
- Pinching Method: Use your tweezers to pinch the base of the lashes to create a fan. This method is ideal for creating narrow fans with a sharp point.
- Flower Bouquet Method: Use your tweezers to spread the lashes out like a flower bouquet. This technique is great for creating wide and fluffy fans.
- Sticky Dot Method: Use a sticky dot on a lash palette to help fan out the lashes before applying adhesive. This method is useful for creating consistent fans quickly.
Proper Adhesive Use
Using the right amount of adhesive is crucial for the longevity and appearance of Russian volume lashes. Follow these tips for proper adhesive use:
- Shake the adhesive bottle well before use to ensure proper mixing.
- Dispense a small amount of adhesive onto a jade stone or adhesive ring.
- Dip the base of the volume fan into the adhesive, ensuring only a small amount is used. Too much adhesive can cause clumping and poor retention.
- Replace the adhesive drop regularly to maintain its freshness and effectiveness.
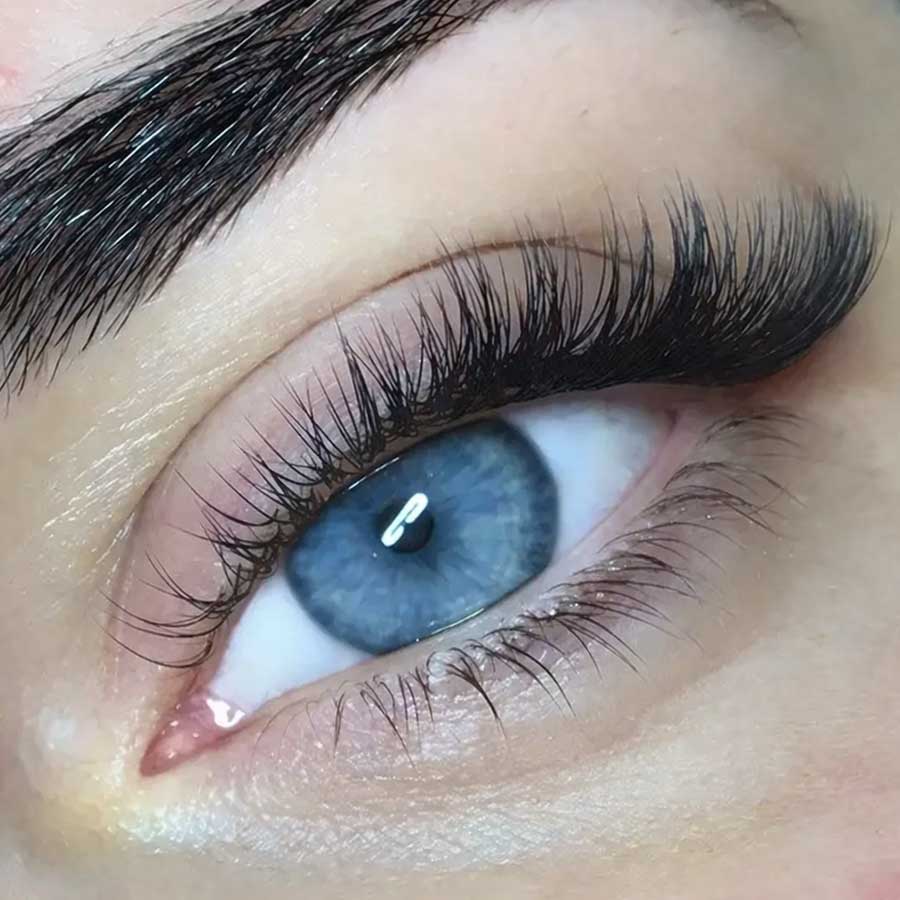
Isolation and Placement
Proper isolation and placement are critical for achieving a neat and professional look. Follow these steps for optimal isolation and placement:
- Use your isolation tweezers to separate a single natural lash from the others.
- Apply the volume fan to the isolated natural lash, ensuring it is placed as close to the lash line as possible without touching the skin.
- Hold the fan in place for a few seconds to allow the adhesive to bond.
- Continue isolating and placing fans on each natural lash, working methodically from the inner to the outer corners of the eye.
Aftercare and Maintenance
Proper aftercare is essential for maintaining the beauty and longevity of Russian volume lashes. Advise your clients to follow these aftercare tips:
- Avoid getting the lashes wet for the first 24 hours to allow the adhesive to fully cure.
- Avoid oil-based products and makeup removers around the eye area, as they can weaken the adhesive bond.
- Brush the lashes daily with a clean lash brush to keep them looking neat and prevent tangling.
- Schedule regular infill appointments every 2-3 weeks to maintain the fullness and appearance of the lashes.
Common Mistakes to Avoid
Even experienced lash technicians can make mistakes when applying Russian volume lashes. Here are some common mistakes to avoid:
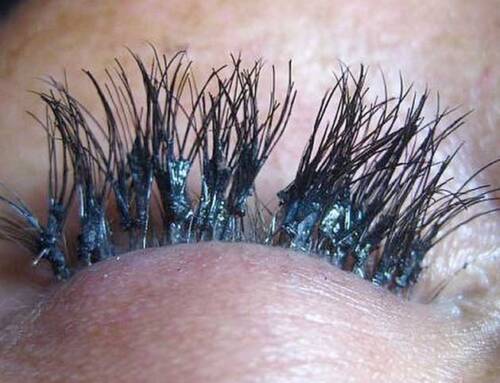
- Using too much adhesive, which can cause clumping and poor retention.
- Improper isolation, leading to multiple natural lashes being bonded together and causing discomfort or damage.
- Applying extensions that are too heavy or long for the natural lashes, leading to premature shedding or damage.
- Not following proper aftercare instructions, resulting in poor retention and lash damage.
Troubleshooting Tips
If you encounter issues during the application process, here are some troubleshooting tips to help you resolve them:
- Adhesive Drying Too Quickly: Adjust the humidity and temperature in your workspace, and use a slower-drying adhesive if needed.
- Extensions Not Sticking: Ensure the natural lashes are properly cleansed and primed, and use fresh adhesive drops.
- Fans Closing Up: Practice your fan-making technique, and use a different method if needed to achieve consistent results.
Advanced Techniques and Tips
Once you have mastered the basics of Russian volume lashes, you can experiment with advanced techniques to further enhance your skills:
- Layering: Apply multiple layers of volume fans to create a more dimensional and textured look.
- Mixing Curls: Combine different curl types to add depth and a more natural appearance to the lashes.
- Color Accents: Incorporate colored lash extensions for a fun and unique twist on traditional volume lashes.
Client Consultation and Customization
Every client is unique, and their lash needs and preferences will vary. Conduct a thorough consultation to understand their desired look and customize the application accordingly:
- Discuss the client’s lash goals and preferences, including length, volume, and curl.
- Assess the client’s natural lashes to determine the appropriate extension type and weight.
- Create a customized lash map to guide the application process and ensure a balanced and symmetrical result.
Mastering the art of Russian volume lashes takes practice and dedication, but the results are worth it. With the right tools, techniques, and aftercare, you can achieve stunning, voluminous lashes that your clients will love. Keep honing your skills and stay updated with industry trends to continue offering top-notch lash services.